
To open the attribute list for a layer, highlight a layer in the Control Center and select the  Layer Attribute button or right-click on the vector layer in the Control Center, and choose
This displays the Attribute Editor window with a table view displaying the attributes for all features in the layer. The attribute list displays columns in the order that the attributes are listed in the layer. The window title bar lists the name of the layer that the list is generated from.
The Attribute Editor window can be floating, or docked, including docked with multiple tabs showing different windows.
To edit an attribute in the tabular view, click on the cell in the table to select it. Then click on it again to enable editing.
Enable the  Synchronize Feature Selection tool to sync the selection between the digitizer tool and the highlighted rows in the list.
Use the SHIFT or CTRL keys to highlight multiple rows, for use with the toolbar buttons like Edit, Delete, and the right-click context menu.
Click a column name to sort the column in ascending order. Click the column name again to sort in descending order. Right-click on the Column Name and un-check listed columns to hide them from the table.
Press the Search button to limit the list to rows that match a search criteria.
Note: Special Attributes values, including <Feature Name>, <Feature Type> <Description> and <Index in Layer are not editable from the Attribute List.
Note: When editing attributes created from a Feature Template, the designed template attribute restrictions will be respected limiting the free form editing of some attribute values. Attributes created from a template will be indicated with [TMPL] in the column header.
Note: The limitation on the number of features that can be listed is 5 million.
Table display
Selection
Use the SHIFT or CTRL keys to highlight multiple rows, for use with the toolbar buttons like Edit, Delete, and the right-click context menu.
Double-clicking on an item in the list will recenter the view on that object.
Count
The bottom of the table displays the count of rows, and the number of selected rows.
Deleted Features
When Render Deleted Features is enabled, deleted features will appear gray in the attribute editor list.
Column Display
The column names are listed in the order that they are found as each feature is processed in the layer list.
Search Results for multiple layers are listed with the attributes in alphabetical order.
Click a column name to sort the column in ascending order.
Click the column name again to sort in descending order.
Use the drop-down menu in the toolbar to modify the method used to sort.
-
Sort: Text - Text mode search. All characters are compared without regard to numeric values.
As a result, the list: will be sorted as: 1 1 2 11 11 2 -
Sort: Numeric - Numeric mode search. Values that are entirely numbers, or that start with a number, will be sorted using their numeric values.
As a result, the list: will be sorted as: 1 1 11 2 2 11 -
Sort: Hybrid - Hybrid mode search. Using this mode, attribute values that are a mixture of alphabetic and numeric characters, will be sorted in a way that honors the numeric values within the string.
As a result, the list: will be sorted as: A11 A1 A1 A2 B1 A11 A2 B1 Note: This option should not be used for sorting list that are entirely numeric and contain decimal points.
-
Sort: Date - Global Mapper will attempt to parse the data in the column as a date. Dates can be in the following formats:
- YYYYMMDD
- YYYY-MM-DD
- YYYY/MM/DD
- *DD-MMM-YYYY (MMM is the 3-letter abbreviation for the month)
- *MM-DD-YYYY or DD-MM-YYYY, (based on system locale and date format settings)
- *MM/DD/YYYY or DD/MM/YYYY, (based on system locale and date format settings)
*Note that these date formats can also use a 2-digit year. The prefix for all two digit years is assumed to be 19.
If an attribute value can not be parsed into one of these date formats, the comparison will use the "Sort: Text" logic.
 Show/ Hide Attributes
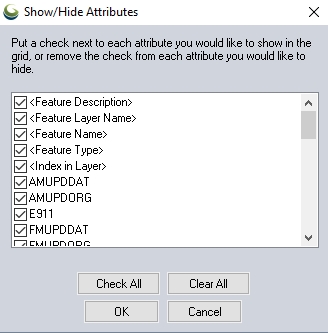
Press the Show/Hide Attributes button or right-click on the Column Name at the top of the table and choose the Show/Hide Attributes... option. In the dialog un-check listed columns to hide them from the table.
Use the Check All and Clear All buttons to quickly select or deselect all attribute.
An individual column can also be hidden by right-clicking on the Column Name and choosing the Hide option at the bottom of the context menu.
Resize
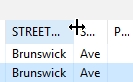
To resize a column, drag the divider between the Column Names at the top of the table. The cursor will display an arrow icon when correctly placed.
To make all columns small, right click on a row and choose Shrink All Columns to Minimum Size .
To expand to their largest width choose Expand All Columns to Full Size and the columns will expand to either header or field entry.
Double click on the divider between the columns to expand the column width back to the full width of the values.
 Search
When the search tool is launched from a layer attribute list, the default search will search within the layer only.
For more information on searching features see Search Vector Data.
If the search is changed to Search All Enabled Layers or Search Onscreen Features Only, the Attribute Editor window name will update to Search Results, rather than the layer name.
Selection and Editing


Use the SHIFT or CTRL keys to highlight multiple rows, for use with the toolbar buttons like Edit, Delete, and the right-click context menu.
Note: For data loaded from external files, all edits will be stored as changes in the workspace. The original file is not modified until a layer is exported. For more information see Creating and Editing Features
Edit
To edit individual values, click in the cell, then click again until the cursor appears to enable editing.
Select rows in the list, then choose the Edit button to edit values for multiple selected features. This brings up the Modify Selected Features dialog which can be used to edit multiple features attributes and properties. With Lidar points selected, this will bring up the Edit Lidar Point(s) dialog. With the <Feature Type> attribute, this will provide a drop-down list of feature types to select from. The <Feature Name> can be edited in the attribute editor directly, and this will update the feature label on the map, if displayed, once the row editing is completed.
See also Undo
Special attributes like <Feature Name> and <Feature Type> are not editable from the Attribute Editor.
Note: When an attribute is modified for a feature that is part of a group of features (.i.e. multi-part area features, poly-lines, etc.) the attribute value will be updated for the entire group.
Note: Lidar data may not be edited by manually typing values into the list. It is possible to edit lidar features using the Edit button or right-click option, which will bring up a edit dialog specific to lidar points.
Delete
Select rows in the list and press the Delete button to delete the table row and associated vector feature.
See also Deleting and Undeleting Features
Select All
The Select All button will select all features in the current search.
If the Attribute Editor Synchronize button is enabled this will also select all of the listed features with the Digitizer tool, and enable the Digitizer tool. This will override other existing selections.
See also Select All Features in Layer(s)
This will clear the row selection in the attribute list. If the sync is enabled,
 Save to CSV
Press the Save to CSV button to save the attributes in the selected rows to an external tabular format. CSV and TXT files are readable by text editor applications, like notepad. They can also be imported as tables in applications like Microsoft Excel.
The export will provide an option to choose the delimiter:
- Comma
- Semi-colon
- Tab
Right-click on the selected rows for the additional options: Copy the Selected Features to the Clipboard and Copy the Selected Results to the Clipboard as Text.
Synchronize Feature Selection with Main Window
This toggle will sync the selection between the digitizer tool and the attribute editor. When the sync is first enabled, it will preference features selected on the map with the digitizer tool.
 Show Only Features Selected in Digitizer
This toggle restricts the visible contents of the Attribute Editor to features that are currently selected with the digitizer. This button is only enabled when the "Synchronize Feature Selection with Main Window" button is selected. When the Sync function is turned off, the "Show Only Features Selected in Digitizer" button is disabled.
 New Attribute
Press the New attribute button to add new attribute to all features currently loaded in the table.
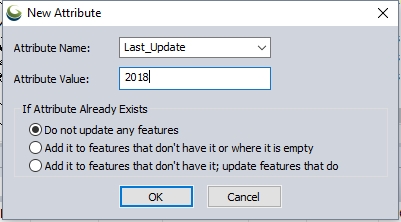
Type a name for the attribute in the Attribute Name box, or choose from the list of attributes recently added in the digitizer tool.
At the bottom of the dialog, choose from the following duplicate attribute detection options:
- Do not update any features - If the attribute name already exists for any of the loaded features, the new attribute will not be added. This option prevents accidentally replacing attribute values.
- Add it to features that don't have it or where it is empty - The specified value will be assigned to the feature only if the attribute value is empty or the attribute does not exist.
- Add it to features to don't have it; update features that do - All features in the current list will be updated with the new attribute value, replacing any other values that might exist for that attribute.
 Update Feature Attribute Order
Attributes can be reordered in the table display by clicking and dragging a column header to a new position. Use the Update Feature Attribute Order button to save the new attribute order to the layer. This will retain the new attribute order when the Attribute Editor is reopened for a layer, when the layer is exported, and when attribute information is viewed in the Feature Info Tool.
Right-click on a column name to see the following options:
- New Attribute
- Delete
- Rename
- Search and Replace
- Copy to New Attribute
- Calculate Statistics for Attribute Values
- Show/ Hide Attributes
- Hide
Rename
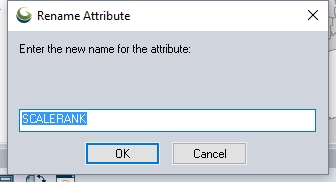
Right-click on a column header and choose the rename option to rename the attribute.
The attribute can also be renamed by editing selected features with Modify Feature Info.
Copy to New Attribute
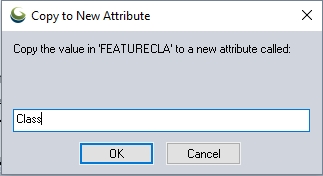
Right-click on the column header, and choose the Copy to a New Attribute... option to copy the values to a new attribute.
In the Copy to New Attribute dialog, enter the name of the new attribute.
More advanced copying of attributes can be done with the Attribute Calculator.
Calculate Statistics for Attribute Values
Right-click on a numeric column in the Vector Search and choose this option to see a dialog report of the Count of features that contain a value for the attribute, and Minimum, Maximum, Average, Standard Deviation and Sum of the attribute values. The results will also be copied to the Windows clipboard.
Mark Column as Epoch
If the Configuration > Vector Display > Advanced option to Show epoch time as readable date in attribute editor is enabled, the option to Mark Column as Epoch will designate the selected attribute as the date/time value for the layer and reformat the attribute values to a readable format.
Right-click on selected row(s) in the attribute list to see the following options:
- COMBINE - Combine Selected Line Features
- Copy the Selected Features to the Clipboard
- Copy the Selected Features to the Clipboard as Text
- Save the Selected Results to CSV/ Excel File...
- Shrink All Columns to Minimum Size
- Expand All Columns to Full Size
- Select All
- Select in Digitizer (Edit) Tool
- Zoom to Selected Feature(s)
- Invert Selection
Copy the Selected Features to the Clipboard
The geometric features, including attributes, will be copied to the Global Mapper clipboard. They may be pasted to a new layer in the current Global Mapper workspace, or a new instance of Global Mapper using the CTRL+V keyboard shortcut or the Edit Menu.
Copy the Selected Features to the Clipboard as Text
The attribute table for the selected features will be coped to the Windows clipboard as comma delimited values.
If multiple line features are selected in the results list, the context menu will contain an option to combine those line features into new line features if the selected lines connect at their endpoints. Options for copying the selected features to the clipboard and selecting the selected search results with the Digitizer Tool for further editing will also appear if any results are selected.
Invert Selection
The selection of features in the attribute list will be reversed, so that all currently selected features are deselected, and all listed unselected feature will be selected.