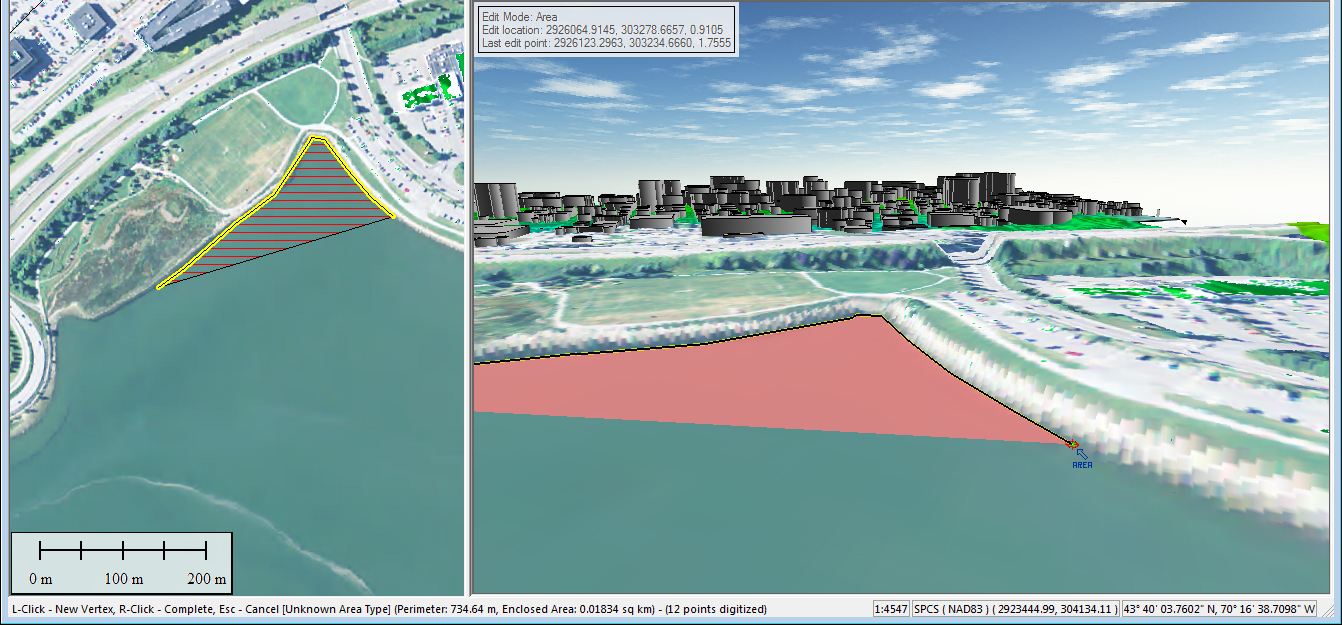
New vector features may be digitized in 3D view by snapping to terrain or vertices of existing vector features.
The digitizer create point, line and area tools may be accessed in 3D by selecting the Digitizer tool, and right clicking to the context menu.
Selection of the digitizer tools 

 in the main application window in the Digitizer(Create) toolbar will also enable the tools in 3D.
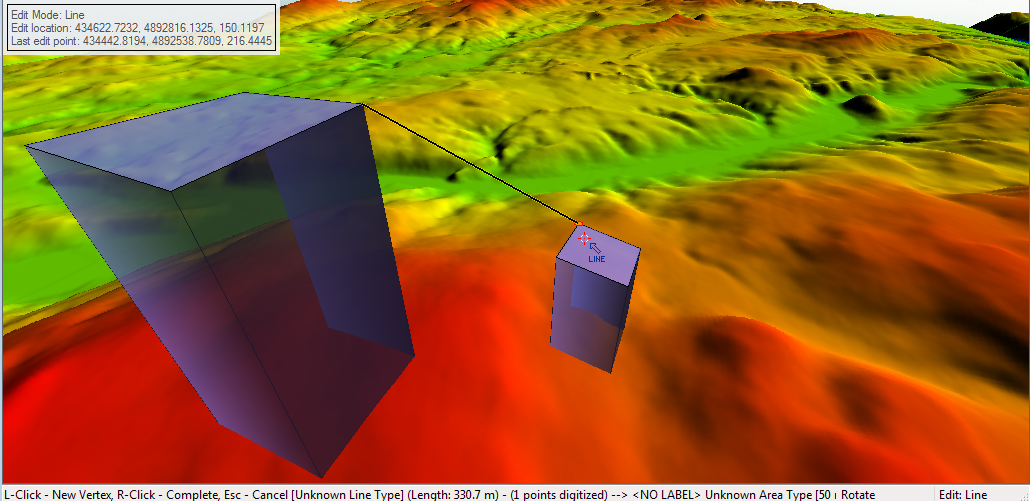
As with the digitizer tool in 2D view, new feature creation is done by left clicking the mouse button to create vertices, then right clicking on the last vertex location to complete the feature.
- Insert Vertex: left- click with mouse
- Complete feature: right-click with mouse. This will bring up the Modify Feature info dialog to allow attribute, layer and style settings for the new feature.
Point, Line and Area features may be created by snapping to the vertices of existing point, line or area feature, or by snapping to terrain data. This snapping selection may be improved using keyboard shortcuts to restrict the vertex selection:
- Hold down the ‘P’ key to filter to point features
- Hold down the ‘A’ key to filter to area features
- Hold down the ‘L’ key to filter to line features
- Hold down the ‘M’ key to filter to mesh features
- Only one of these modifier keys may be active at a time.
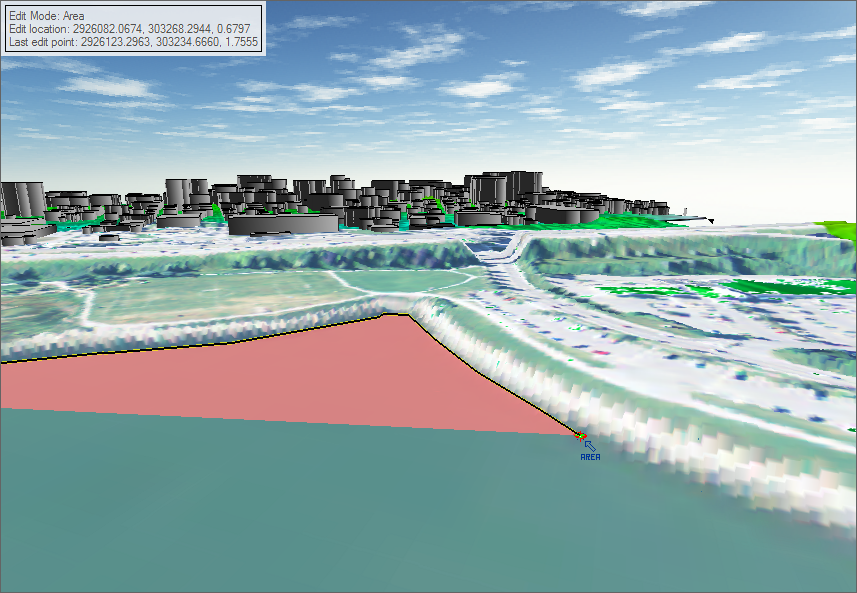
When snapping to existing vector features, the snapped vertex location will be indicated with an orange circle. When snapping to the terrain, the snapped vertex location will be indicated with a green circle.
The bottom bar of the 3D view window will indicate the number of points (vertices) that have been added to the active feature. The notification window (in the top left of the above image) shows the edit location based on the cursor, and the last edit point (i.e. the last placed vertex). The notification window will also show any special modes that are active, including locked navigation modes:
Locking the view movement:Sometimes it can be useful to restrict the movement of the 3D scene in one dimension or another. You can lock the movement to either a horizontal or vertical plane using the H or V keys. Note: locking is not allowed in Walk mode.
- H: The key enables horizontal locking if it’s disabled, otherwise it disables it. Horizontal locking only allows movement in a plane that’s horizontal to the pivot axis.
- V: The key enables vertical locking if it’s disabled, otherwise it disables it. Vertical locking only allows movement in the plane defined by the screen center and the pivot axis.
Active feature creation with the digitizer may be switched back and forth between working in the 3D view and 2D view(s).
3D Digitizing and Editing Shortcut Keys
- CTRL+SHIFT+Z sets the viewer to Zoom Mode
- While digitizing or editing, CTRL+Z undoes the last point.
- ESC:
- While selecting, the Escape key clears the current selection.
- When digitizing, the Escape key cancels the current digitizing operation, and reverts to selection mode.
- When measuring, the Escape key cancels the current measurement operation.
- ENTER:
- When digitizing, the Return key completes the current digitization operation.
- When measuring, the Return key completes the current measurement operation.
- DELETE: If there is a current selection available, the selected features are deleted.
- When Selecting, Digitizing or Measuring: when moving the mouse,
- Hold down the ‘P’ key to filter to point features
- Hold down the ‘A’ key to filter to area features
- Hold down the ‘L’ key to filter to line features
- Hold down the ‘M’ key to filter to mesh features
- Only one of these modifier keys may be active at a time.