3D Fly-through Videos 


The Fly-Through feature creates videos where the viewer travels over the 3-D data. This can be done in 4 easy steps:
Defining or Editing a Fly-through Path
Saving or Importing a Fly-Through Path
A Fly-through path definition requires saving multiple attributes for each vertex of the line feature, rather than just for the feature as a whole, which means the fly-through data is not able to be stored in all vector file formats. Global Mapper does recognize the fly-through attributes from Google Earth, and can generate them from GPS tracks.
The supported formats for saving or loading a fly-through path are:
- Global Mapper Workspace
- Global Mapper Package
- Global Mapper Mobile
- GPX (GPS eXchange Format) File
- KML/KMZ
- Simple ASCII (XYZ) Text File
- Text File
- XYZ (Simple ASCII) Text File
For more information on importing existing data, see Timestamp Attributes
Fly-through Tools
The Fly-through tools allow for previewing, rendering and saving 3D Fly-though videos.
Launch the 3D Viewer. Click on the 'Preview Fly-through' toolbar button. This will bring up a dialog that will step through each key frame. The view parameters for each frame can be altered.
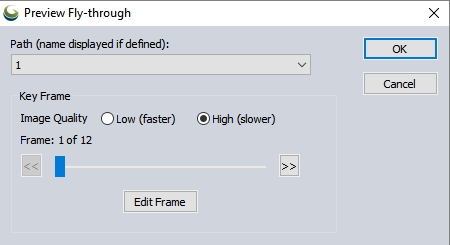
Use the path drop-down to select which fly-through path to preview. If the fly-through path has a feature name, that will be displayed following the number. Otherwise multiple paths will be numbered.
Set the Image Quality to Low or High. This setting will affect all key frames.
Use the slider or the arrows to step through each key frame in the video. Use the Edit Frame button to modify the attributes of the current frame. The video parameters will smoothly transition between the key frame values.
Use this option to preview and edit Fly-through data and to generate Fly-through data from a selected path. The path must be selected with the digitizer tool to enable this option.
In the 3D window, the fly through path may be hidden by the 3D view properties setting. Check the 3D View Configuration options in the 3D View settings, or select the path in 2D to enable the edit button.
To view the fly-through video, click on the Play Fly-through toolbar button. The play button will run a video showing the fly-through. This is a quickly generated video that is not as detailed as an exported video file may be. For the highest quality video, save to a video file.
Select Path
If multiple fly through paths are defined, the fly through options dialog will display to select which path(s) to render. The all paths option will play the fly through paths sequentially.
Play as loop (automatic repeat)
Check this option to continually loop through the preview playback.
These dialog selections will be remembered if fly-through is paused. Press the Cancel button to select a different fly-through path to play, or to disable the loop option.
Image Quality
Set the image quality for the 3D fly through to Low or High. Low quality will process faster, but with less detail.
Pause Fly-through
Pauses a fly-through video currently in progress (this button replaces the Play Fly-through button when the video is playing).
Cancels the fly-through video currently in progress.
Saves the selected Fly-through path to a video file. The fly-through video will render at the export speed while saving. The render while exporting in 3D may be slower or less smooth than the final video result. For video export settings, see more information below.
Creating
a Time Synced Fly-Through
After saving the fly-though video to a video file, the Fly-Through Video can be synced with the defined flight path. This means that the location of the camera (or vessel) will be displayed along the flight path when the video is played, and clicking along the line feature with the video playback window open will jump to the video frame for that location.
A Time Synced
Fly-Through video can be created from any point features with recognized
timestamp attributes or line features
with per-vertex times. Create the link between the feature and saved Fly-through
video using either the Feature Info tool in the 2D workspace, or the Digitizer tool.
The link between the line feature and video file is automatically saved in the workspace where the fly-through video was saved.
Play Video Associated with Feature
In either the 3D or 2D workspace, select the generated Flight Path with the Digitizer tool. Right-click and select the option to Play Video Associated with Feature...
If video is associated with the feature, select it with the Open dialog.
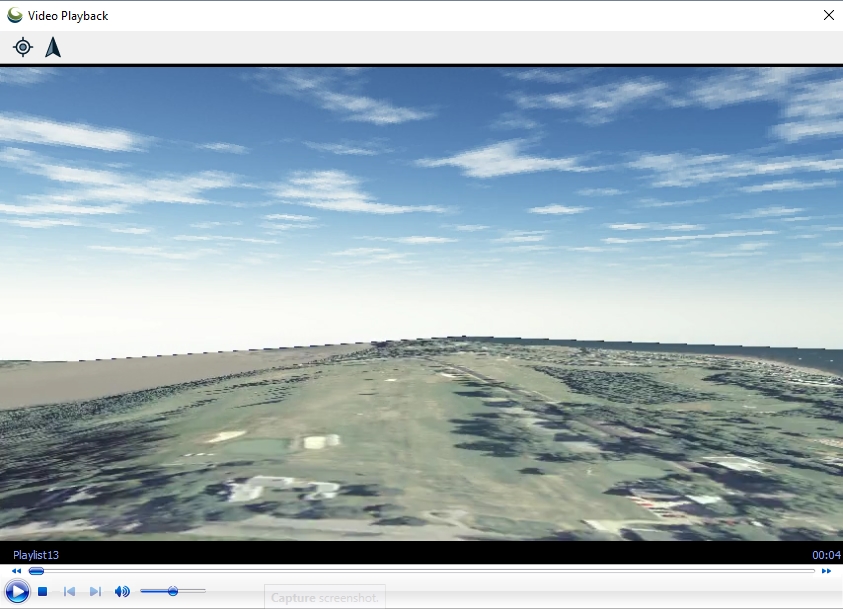
The Video Playback window will open and display the video. Use the video controls to play back the video, and the vessel location will update along the path. Alternately, click along the path to jump the video to the correct frame for that location.
 Keep Video Symbol on Screen
Press this option to update the map display bounds during playback so that the camera location and indicator is always on screen.
 Orient View to Video Heading
Enable this option to rotate the map display to orient the map in the direction the vehicle is heading. Note this is not necessarily the direction the camera is pointing.
Camera Indicator
The camera position will be indicated along the fly-through feature with a vector symbol. By default it is a black triangle, oriented to the direction of travel. The symbol of the vessel can be customized in GPS Configuration.
Video Controls
Video Playback is performed with an embedded Windows Media Player. For additional options and controls, right click on the video window. For more information about video controls see Microsoft Support
Play Multiple Videos Associated with Feature
In either the 3D or 2D workspace, select the generated Flight Path with the Digitizer tool. Right-click and select the option to Play Multiple Videos Associated with Feature...
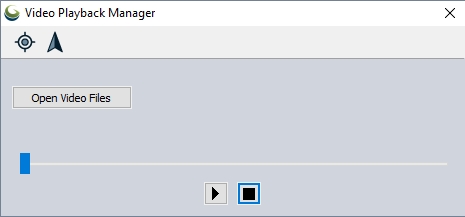
Press the Open Video Files button to open multiple video files associated with the feature. Each video will open in a separate window.
Use the Play, Pause and Stop buttons or slider on the Video Playback Manager to control the playback of all videos simultaneously.
Feature Info Tool Playback
To use the Feature Info Tool, activate
the Feature Info Tool  Right-click in the Feature
Information window (below) for the selected flight path.
Right-click in the Feature
Information window (below) for the selected flight path. 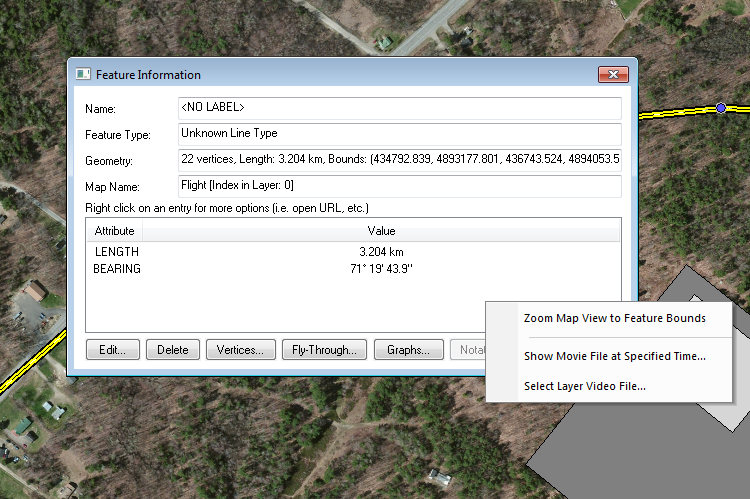
Choose the option to Select Layer Video File... from the right-click menu.
Navigate to where the video file is located on the machine and click
Open. Then select the option to Show Movie File at Specified Time....
Once the Time Synced Fly-through video has been created, a cursor will follow along the selected flight path in the Global Mapper workspace, indicating the time-synced location displayed in the Video Playback window.
Recording a Fly-Through Path in Walk Mode or Fly Mode
A fly-through path can also be creating by recording a path while navigating the data in the 3D viewer in Walk Mode or Fly Mode. The path will follow the route taken by the user within Walk Mode or Fly Mode.
To create a fly-through path this way, open the 3D viewer, and then activate either Walk Mode or Fly Mode from the 3D viewer toolbar. To begin recording the path, click on the  Record button in the toolbar. It will flash once it is recording. Navigate around the data using the Walk Mode or Fly Mode navigation controls to create the desired path, and then once finished, click the Record button again to stop recording.
Once you finish recording, a Modify Feature Info window will appear, to save your path as a line feature. After the line feature is saved, it is ready to use for a Fly-Through, by clicking Preview Fly-Through or Play Fly-Through in the 3D Viewer toolbar.