Feature Templates
The Feature Templates section of the Configuration allows for the creation of templates for vector features so that they conform to a predefined set of feature properties and attribute values.
Access Feature Templates by selecting the  Configuration button from the File Toolbar or Tools menu, and navigating to the Feature Templates section.
Like custom feature types, the feature template descriptions are saved in the user data folder. Feature template definitions can be imported and exported for backup or sharing with other users. (When a package file containing feature template layers is opened, the templates described in that file will be added to the user template collection.)
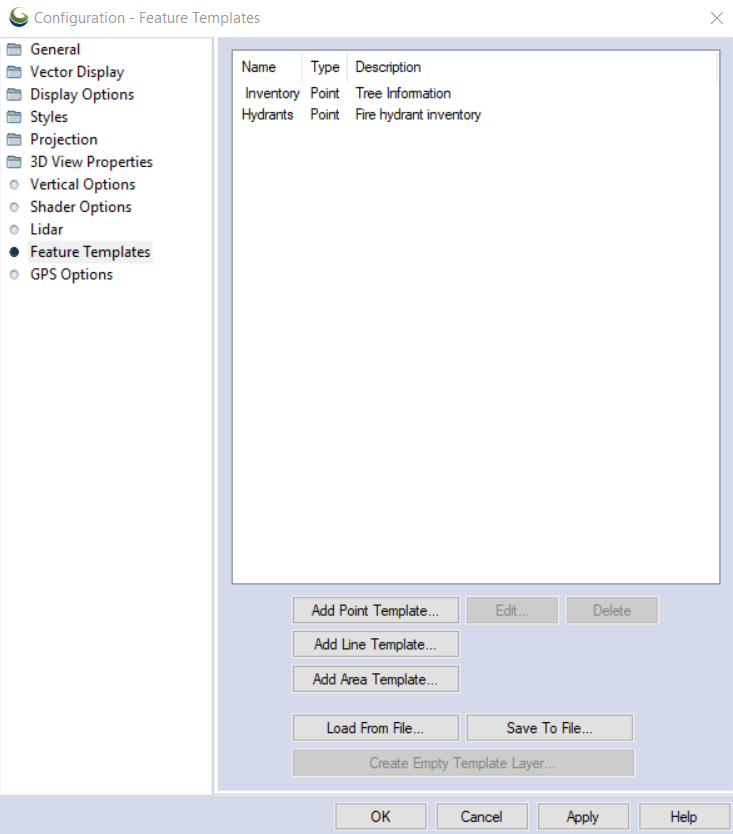
Click on the Configuration button, and select the “Feature Templates” tab to create and edit templates.
Add Point Template, Add Line Template, and Add Area Template
These bring up the corresponding Feature Template Dialog to add a new Feature Template. See Creating Feature Templates. Once created, the template type cannot be changed.
Edit...
Brings up the Feature Template Dialog to edit the highlighted Feature Template in the list.
Delete
Delete the highlighted Feature Template
Load From File...
Load a previously saved Feature Templates file (*.gm_featureTemplates). This will overwrite any currently displayed feature templates. Be sure any of the current templates are saved in a workspace or Feature Templates file.
Save To File...
Create a Feature Template file (*.gm_featureTemplates) from the current list of Feature Templates.
Create Empty Template Layer...
This will create a new empty layer in the workspace based on the highlighted feature template.
Creating Feature Templates
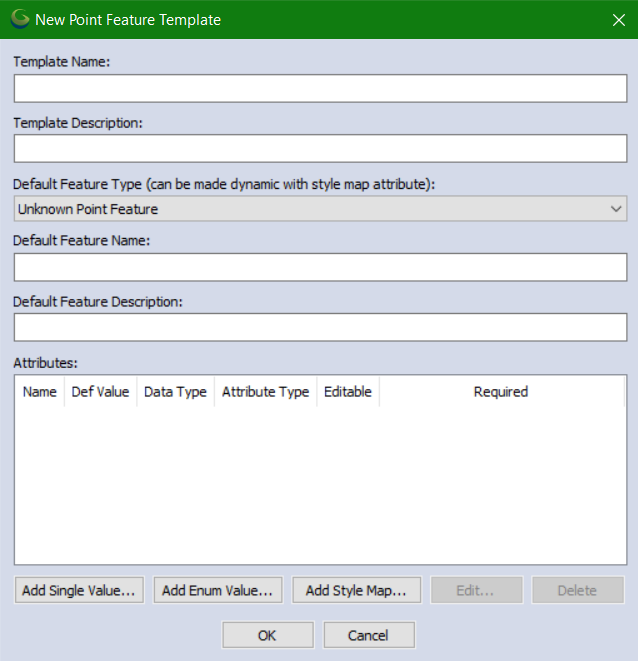
Feature templates are defined with the following dialog corresponding to the feature type:
-
Template Name - Name of the template. This will be displayed in the Feature Template tab of Configuration, and also will be the name shown when adding a Feature Template layer in the Control Center.
-
Template Description - Optional description of the template. This will be displayed in the Feature Templates tab of Configuration. .
-
Default Feature Type - The feature type that will be applied by default to the Feature Template Layer. This will control the default styling of the layer.
-
Default Feature Name - This is the default name (label) of new features.
-
Default Feature Description - The default description of new features.
-
Attributes
All attributes created for the template are shown in the main new feature template window (above).
Choose an attribute type from the buttons below the window to add Attributes. All options start with a version of the Feature Template Attribute dialog: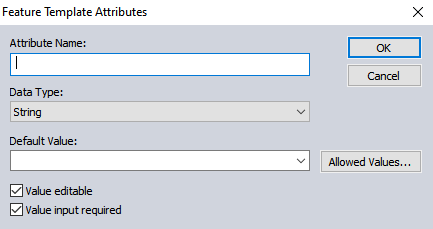
Attribute Name - specify the name of the attribute
Data Type - set the value to be String (any characters) , Integer (whole numbers, signed 32-bit) , Float (single precision, decimal and scientific notation) or Boolean (0, 1; false, true; no, yes; etc.- not case sensitive). This data type will be validated during feature creation or editing.
Value editable - Select the Value editable check-box to allow users to edit attributes. Otherwise they will be required to pick one of the allowed values for that attribute.
Value input required - If this check-box is selected, the user will be prompted to enter a value for the attribute when a new feature is created. (The user may add additional attributes to a feature if desired.)
-
Add Single Value...
-
This creates an attribute that only allows one preset value. When the template is used this attribute can either have the preset value, or be left blank. The feature type for this attribute will either be the template default, or assigned with the Style Map.
-
Add Enumerated Value...
-
This creates an attribute that allows the user to choose from multiple values. Feature types can only be set if no Style Map has been added.
-
Add Style Map...
-
This allows you to create a personalized sub-list of Feature Types to set the styling of the attribute. When using a template with a Style Map, you will be prompted to choose a prenamed Feature Type "Attribute Value" from this list. This is useful when multiple different Feature Types are used in the same layer as it limits the number of Feature Types the user has to scroll through.
Only one Style Map can be created per Template.
Using Feature Templates
Once the desired feature templates have been defined, layers that can apply the templates must be added to your project. Click on the Control Center button, and right click on the layer list area. Select the menu option “Create a New Feature Template Layer…”. A new layer will be created and a layer property sheet will be displayed. Select the “Template” tab to specify which feature template that layer will apply to new features added to the layer.
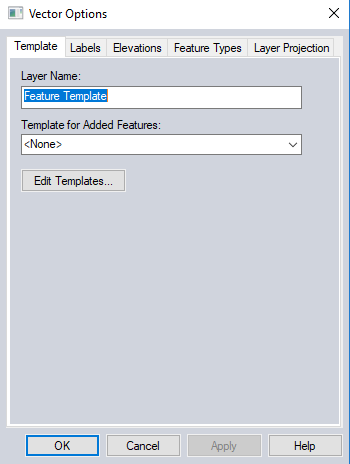
The user may only add features of the type defined by the feature template (point, line or area) to the layer.
Once the feature template layers have been defined, the project can be exported to a Global Mapper Mobile Package file (*.gmmp) for use with the Global Mapper Mobile application.
To create features in the Feature Template Layer in Global Mapper, use the Digitizer to create a new feature. Select the feature template layer to place the new feature. Only those template layers with compatible template types (point, line or area), will be included in the layer list. If there are any attributes with the “Value input required” option set, the user will be prompted for those values after clicking OK. A similar procedure is conducted to create features using the mobile application.
When editing features in a feature template layer the original feature template attribute rules and options will be respected. In the Attribute Editor, attributes created from the template will be indicated with [TMPL] in the column header. Single value attributes cannot be edited, enumerated value attributes will populate a dropdown picklist for editing, and required attributes cannot be made empty.