Click the Path Profile Toolbar buttons below to jump to information about each tool.


For Path Profile tools with Lidar data, see Using the Path Profile Tool with Lidar/Point Cloud Data
The Path Profile Menu options available in the floating window are also available when the Profile window is docked. These menu options will appear in the context menu when right-clicking on the Path Profile.
Profile Polygon Shading
Choose a compatible terrain shader from the dropdown menu to color the profile based on elevation. Compatible shaders are those that do not depend on terrain slope or lighting. Custom shaders will also be listed if they are compatible. For more information on Shaders, see Shader Options.
In addition to the standard elevation shaders, built-in options include:
None - This option fills the polygon with a solid color as specified in the right-click menu settings.
Main View - Uses the shader selected in the main view toolbar, if compatible.
File Menu
The File menu contains options allowing you to save the path profile / line of sight data to a file. The individual options are described below.
-
 Save Profile to BMP...
Use this option to save the contents of the path profile window to a Windows bitmap (BMP) image file for use in other applications or placing on a map layout.
-
Save to BMP and Display on Map...
This option allows registered users to save the contents of the path profile window to a Window bitmap (BMP) file and then display that BMP at a fixed location on the main map view. This is the equivalent of using the Save to Bitmap menu command, then closing the dialog and using the File->Open Data File at Fixed Screen Location menu command in the main map view.
-
Save Profile to Vector/PDF...
This option allows the user to export to any supported vector format and to a PDF document. Once selected, a drop down menu will appear, allowing you to specify the desired format.
-
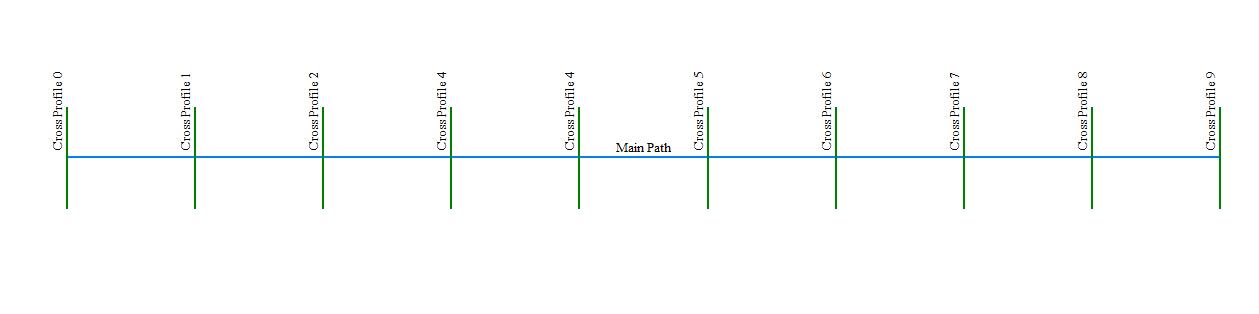
Save Cross-Profile Series...
This option allows the user to export all cross sections (perpendicular profiles) of the path at once. With this option profiles can be saved as a Bitmap (BMP) file, or as a Vector file type from the drop down list: Distance Z/elevation file, DWG, DXF, PDF, Simple ASCII (XYZ) Text, or SVG file format.
When saving as a PDF, check the Single Sulti-page PDF File option to save all profiles to one multi-page PDF file, with one profile per page. If this box is unchecked, each profile will be saved as a numbered individual PDF file. -
-
-
Save Path to New Layer...
The path of the profile line is added as a new 3D line feature in a new Path Profile layer.
Selecting this option with Perpendicular Profile enabled will display the Perpendicular Profile Export dialog. The following options are available to specify which profile lines to include in the new layer:
- Main Profile Path and All Cross Profiles
- Only Current Cross Profile

- Only Main Profile Path
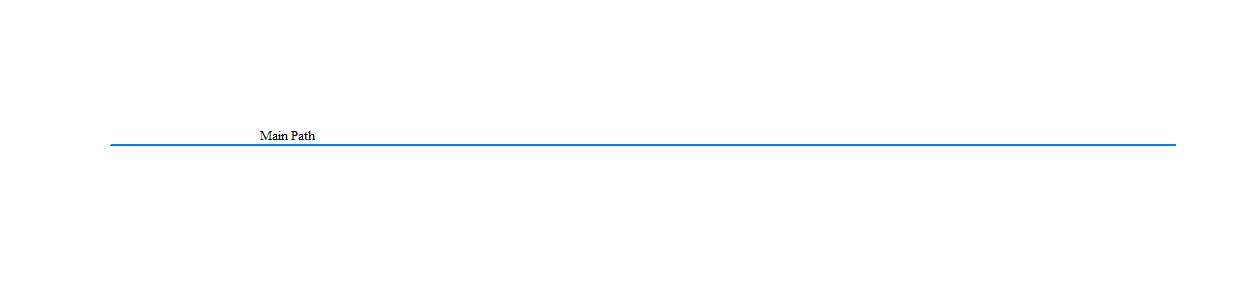
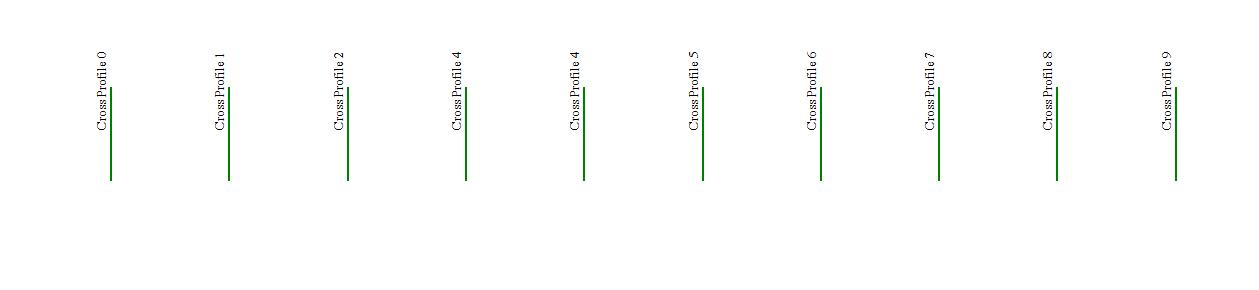
- All Cross Profiles
- Main Profile Path and All Cross Profiles
-
Save Path to DXF...
This option allows registered users to save a 3D line of sight to a DXF file.
Selecting this option with Perpendicular Profile enabled will display the Perpendicular Profile Export dialog. The following options are available to specify which profile lines to include in the new layer:
- Main Profile Path and All Cross Profiles
- Only Current Cross Profile
- Only Main Profile Path
- All Cross Profiles
- Main Profile Path and All Cross Profiles
Path Setup Menu
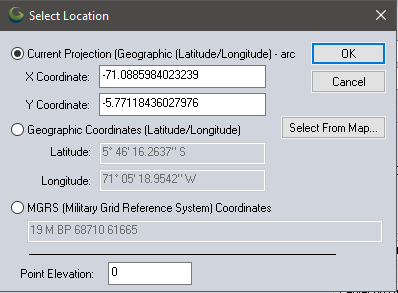
The Path Setup Menu menu allows you to set the start (Select From Position...) and end (Select To Position...) position of the Path to profile, using coordinate values. You can also define maximum and minimum elevation values to include in the profile, in addition to setting the sample count and spacing (Specify Sample Count/Spacing Distance...).
Thiese options allow for redefining the starting and ending points of the profile line. From the Select Location window specify the new coordinates using the current display projection, geographic coordinates, or MGRS coordinates, or press the Select From Map... button to select the new location from a map view.
This brings up the Path Profile Spacing Setup window. This option controls the sampling of elevation values along the profile.
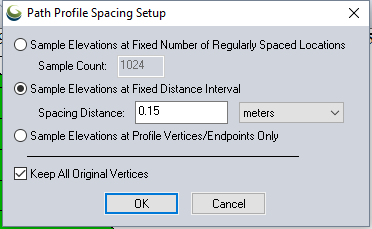
Sample Elevations at Fixed Number of Regularly Spaced Locations — This setting will sample elevations at evenly spaced location along the length of the line.
Sample Elevation at Fixed Distance Interval — This will sample elevations at a fixed distance along the length of the line.
Sample Elevations at Profile Vertices/ Endpoints Only—This option will sample elevations at each vertex of the line.
Keep All Original Vertices — This option is available when using Sample Elevations at Fixed Number of Regularly Spaced Locations or Sample Elevations at Fixed Distance Interval. In addition to sampling elevation at the selected locations, it will also sample at each vertex and the endpoints of the line feature.
The Show Path Details option will bring up a dialog displaying additional information about the path profile.
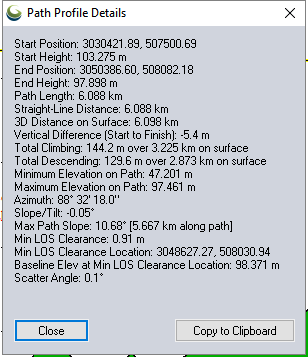
The following additional line information is displayed:
- Start Position
- Start Height
- End Position
- End Height
- Path Length
- Straight-Line Distance
- 3D Distance on Surface
- Vertical Difference (Start to Finish)
- Total Climbing
- Total Descending
- Minimum Elevation on Path
- Maximum Elevation on Path
- Azimuth
- Slope/Tilt
- Max Path Slope
If a Line of Sight has been calculated, this dialog will also display:
- Min Line of Sight Clearance
- Min Line of Sight Clearance Location
- Baseline Elevation at Minimum Line of Sight Clearance Location
- Scatter Angle
- Path Loss (when Fresnel Zones were specified)
Path Profile Settings...
Display Options
The Display Options menu allows the user to set up the display and styling for the Path Profile/ Line of Sight window. Here units, fonts and colors can be managed for the display.
-
Set Background Color...
- This option sets the color of the entire Path Profile Window.
-
Set Cursor Text Font...
- This option allows the user to change the font, style, size, color, script, and add effects to the informational text attached to the cursor in the Path Profile window.
-
Set Terrain Color...
- This option changes the fill color of terrain features in the Path Profile window.
-
Set Text/ Grid Font...
- This option changes the text within the Path Profile window including the graph labels, lines, and position information.
-
Set Intersection Line/Area style...
- This option allows the user to turn the Tails on and off. Tails are the vertical lines that extend above and below a vector feature for added visibility. This option is only applicable if the Draw Line/Area Features that Cross Path option is enabled in Path Profile Settings.
- This option allows the user to turn the Tails on and off. Tails are the vertical lines that extend above and below a vector feature for added visibility. This option is only applicable if the Draw Line/Area Features that Cross Path option is enabled in Path Profile Settings.
Calculate Menu
The Calculate menu offers setup options for the calculation of Line of Sight and Cut-and-Fill Volume calculations, in addition to point feature creation at minimum and maximum elevation locations.
Line of Sight
Pressing the Line of Sight button or selecting the option from the Calculate menu brings up the Setup Line of Sight/Earth Curvature dialog (pictured below), which allows the user to configure a line of sight calculation along the selected path. Go to the Line of Sight page for more information about this analysis.
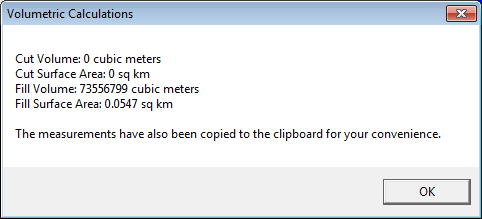
Pressing the Cut-and-Fill Volumes button or choosing the option from the Calculate menu, brings up the Setup Volume Calculation Parameters dialog. This allows for cut-and-fill volume analysis along the path using the loaded terrain data. See the Measure Tool for more information on cut-and-fill volume setup.
Once you have performed a cut-and-fill analysis, the cut line will be displayed on the path profile allowing easy visualization of the cut and fill areas along the path, as evidenced by the picture below.
Create Point Features at Minimum and Maximum Elevation Locations
This option will create point features in the User Created Features Layer showing the minimum and maximum elevations along the path.
Use Profile View for Path Profile Tool
This option is available when the path profile window is docked in a multi-view pane. This allows un-linking a path profile graph from the path profile tool, so that a new path profile can be generated in a new window.
Clear Profile
This option is available when the path profile window is docked in a multi-view pane. This will clear the path profile graph so the map view pane is empty and reset to no profile path.
Remove Line of Sight
If a line of sight path is active, this option removes it.
Remove Volume Cut Line
If a volume cut line is drawn, this option removes it.
Create Point Feature at Cursor location
This setting creates a new point feature at the current cursor location in the path profile. By default this will be a three dimensional feature with a height value matching the cursor location (the y-axis value) in the path profile window.