3D Rectification
With lidar data or 3D models, the rectification option supports adding 3D control points, include X, Y and Z values for the control points in both the source data being modified and the reference data. At least 4 control points are required to perform 3D rectification.
Access the Rectification tool from the File menu > Rectify (Georeference) Imagery.... This option can load any supported file(s), including vector data. Loading an unreferenced raster file will automatically prompt with an option to rectify in the Select Position to Use dialog (shown below). To rectify an existing loaded layer, right-click on the layer in the Control Center and choose RECTIFY.
|
|
This tool requires Global Mapper Pro |
Steps for georeferencing 3D Data
- If necessary set the Ground Control Point Projection to determine what projection the data will be aligned in.
- Locate the control point position in the Zoomed View of the point cloud. The Source X Y and Z value will automatically populate with information from the nearest lidar point. If necessary update the values manually. When rectifying a mesh, enter the Source Z value in the Ground Control Point entry section.
- Add the corresponding control point in the reference view, or manually enter the To X, Y and Z value.
- Click Add Point to List to finalize adding the control point.
- Repeat for at least 3 more control points, distributed well throughout the data. Or check the option Ignore Z Values to only perform a horizontal shift on the data (2D rectification), which requires a minimum of 3 control points for an affine transformation.
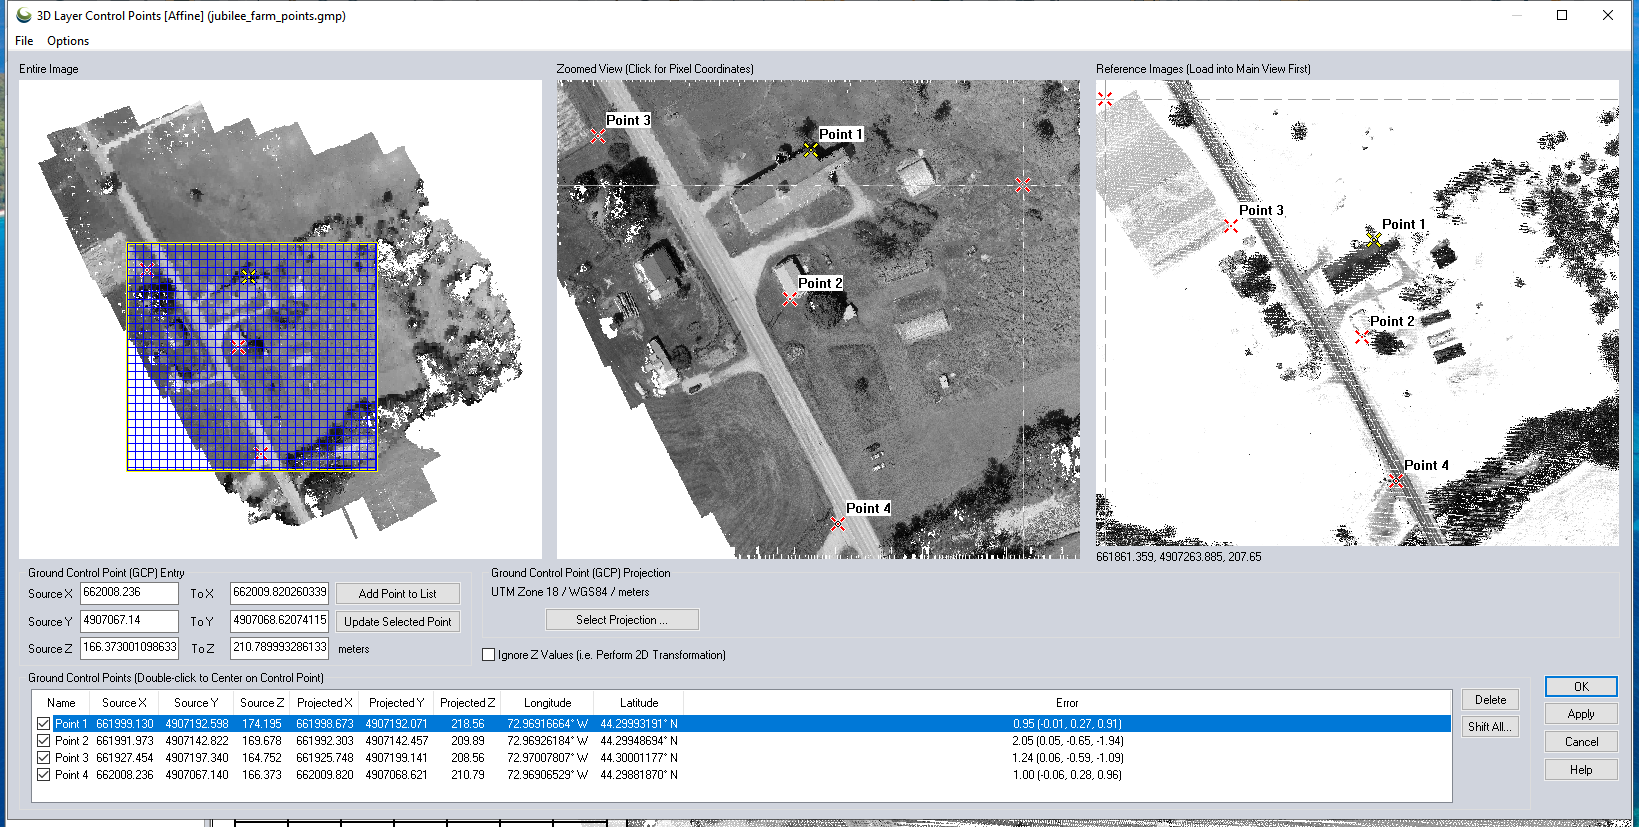
Ground Control Points
Enter ground control points by clicking on the Zoomed view and Reference Image view, or by manually entering values in the Ground Control Point Entry Field.
Ignore Z Values (i.e. Perform 2D Transformation) – Check this option to perform only a horizontal transformation. Z values will not be changed.
Method
3D rectification calculates a 3D affine transformation. It finds a 4X4 matrix that best fits the control points.
With Ignore Z Values checked, any of the 2D rectification methods can be chosen from the options menu, as described in Rectification.