Search and Replace
Search and Replace searches for a value in the attributes and name of loaded features and replaces that with some other text string. When selected, the Search and Replace dialog (pictured below) is displayed, allowing for the setupof the search-and-replace operation.
The Search and Replace option is located in the top level Search menu. This tool can also be accessed from the Attribute Editor window by right-clicking on a Column Heading.
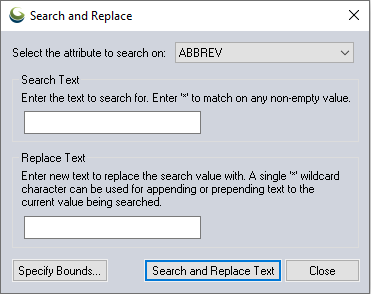
Select the Attribute to Search on
From the drop-down list select which attribute to search.
Search Text
Enter a Search Text value for the software to identify. An asterisk (*) can be used as a wildcard to match any non-empty value. Use the asterisk (*) at the start or end of the search string to look for text that starts or ends with some particular text.
The entire string match that is found including any variable parts designated with an asterisk (*) will be updated with the Replace Text.
Replace Text
Specify a simple text string to replace the Search Text with, or use a single wildcard, like an asterisk (*), to prepend or append text. In the Replace Text box the wildcard character represents the search string.
When the search string also includes a wildcard character, like an asterisk (*), then the replacement will be on the matched substring.
Example:
Prepend the text Lake in front of all of the values in the NAME attribute.
Use a wildcard, *, as the Search Text and Lake* as the Replace Text.

To append the text to all NAME attribute values, use *Lake as the Replace Text.
Example:
Replace any string that starts with S with South.
Use the Search Text S* and the Replace Text South*.

Specify Bounds
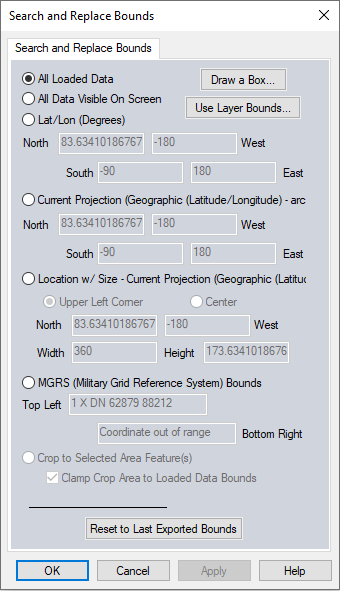
All Loaded Data
All currently loaded data that is compatible with the current export type will be exported. This is the default selection.
Draw Box
Pressing the Draw Box... button brings up the Drag a Box to Select Export Bounds dialog. In this dialog, simply hold down the left mouse button and drag a rectangle around the area of the image that you wish to export. If a mistake is made, just drag another rectangle.
Use Zoom In and Zoom Out to change the visual scale when selecting Export Bounds.

When you press the OK button, the bounds of the rectangle that you drew will automatically be inserted into the appropriate controls in the Export Bounds panel.
Use Layer Bounds...
Choose one or more layers from the list of layers. The bounds will be set to the rectangular extent of the layer(s).
All Data Visible On Screen
All data that is currently visible in the Global Mapper view window will be exported.
Lat/Lon (Degrees)
Specify the subset to export as a bounding box in latitude/longitude coordinates. The default values automatically filled in are the lat/lon bounds of all currently loaded compatible data.
Current Projection (projection)
Specify the subset to export as a bounding box using coordinates in the currently selected global projection system. The short name of the projection will be displayed in the parenthesis. The default values automatically filled in are the bounds of all loaded compatible data.
The values will automatically update when using the Draw a Box or Use Layer Bounds buttons.
Location w/ Size - Current Projection (projection)
Specify the subset to export by entering and North and West anchor point, and the width and height of the desired area to export. The coordinates entered must be in the currently selected global projection system. The short name of the projection will be displayed in the parenthesis.
The coordinates can by set to define the Upper Left Corner or the Center of the rectangle by using the radio buttons. The default values automatically filled in result in a bounding box containing all loaded compatible data.
The values will automatically update when using the Draw a Box or Use Layer Bounds buttons (though the selection will be set to Current Projection when using these tools).
MGRS (Military Grid Reference System) Bounds
Specify the subset to export by entering the northwest and southeast corners of the bounding box to export in MGRS coordinates. The default values automatically filled in result in a bounding box containing all loaded compatible data.
Crop to Selected Area Feature
If enabled, allows the user to crop the export to the currently selected area feature(s). To use this for supported exports, select the area(s) that you wish to crop the export to using either the Feature Info Tool or the Digitizer Tool.
Clamp Crop Area to Loaded Data Bounds
If this option is unchecked, the export bounds will be the bounds of the crop area(s), even if they extend outside the data bounds.
Reset to Last Exported Bounds
This option will update the coordinates in Current Projection to match the bounds of the last exported or generated data.