When you load an unreferenced Raster file you will be prompted to rectify the image, fake coordinates or cancel the loading of the image.
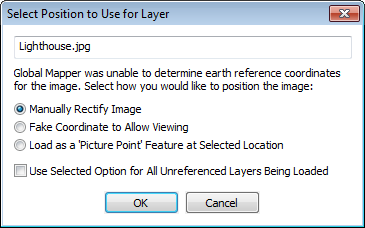
Choose Manually Rectify Image and click ok to go to the rectification dialog.
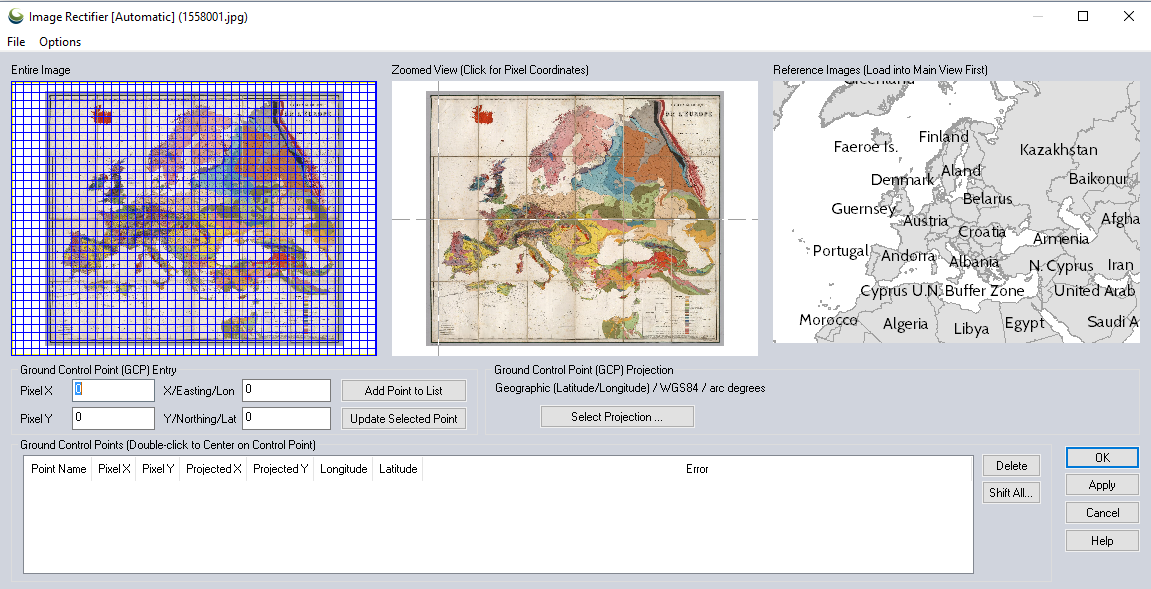
Entire Image - Displays the entire image for referencing. Click and drag to select a zoom level.
Zoomed View - Displays the zoom level chosen in the Entire Image section. Use this section to choose your pixel coordinates for referencing by clicking.
Reference Images - Displays the reference images that you currently have loaded into Global Mapper. Use this section to choose your projection coordinates by clicking.
Ground Control Point Entry - Displays the currently selected Pixel coordinates and Reference coordinates. These sections will be automatically populated based on where you click in the Zoomed View and Reference Images sections. The points can also be manually enter as needed. The Add Point to List button will update the Ground Control Points section with a new entry. The Update Selected Point button will modify the points of a currently selected entry in the Ground Control Points section.
Ground Control Point Coordinate System - Displays the coordinate system information for the currently loaded data. The Select Coordinate System button can be used to choose a different coordinate system for the purposes of Image Rectification
Ground
Control Points - Displays information about all currently entered
reference points.
The Rectifier Options Menu allows
you to setup options related to the rectification process.
Keyboard Shortcuts for Image Rectifier window:
- PAGE DOWN....................Zoom In
- CTRL + PAGE DOWN........Zoom In a Tiny bit
- PAGE UP..........................ZOOM OUT
- CTRL + PAGE UP ..............ZOOM OUT a TINY bit
For More information see Rectification