 Saving a Fly-through video
To create a fly-through video file, click on the Save Fly-through toolbar button in the 3D View. It is not required to Play or Preview the video first, but a fly-through path must be defined.
This will show a
dialog to specify the desired video output.
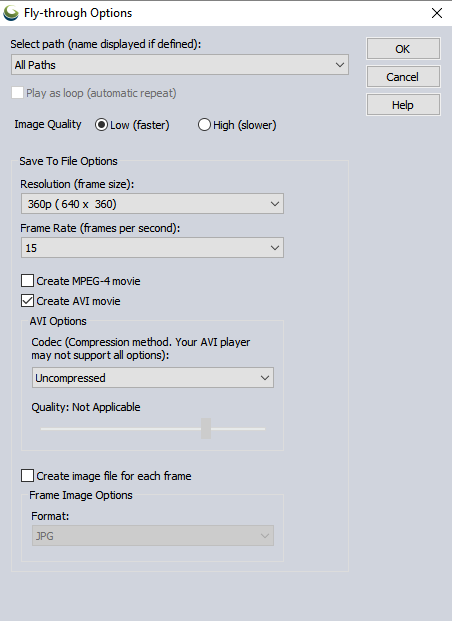
Select Path
Specify the path to use in the fly-through video. The default of All Paths will save all fly-through paths in layers marked visible in the control center, sequentially, in the output video. If there are multiple paths, each will be numbered in the dropdown, and labeled with the Feature Name if available.
Image Quality
Set the image quality to Low or High. Low quality will process faster, but with less detail.
Save to File Options
Resolution - the pixel dimensions of the video file.
Frame Rate - the number of frames per second in the video file.
Resolution and Frame Rate Choices include:
- 360p (640 x 360 pixels) 15, 24, 25 or 30 FPS
- 480p (854 x 480 pixels) 15, 24, 25 or 30 FPS
- 720p (1280 x 720 pixels) 15, 24, 25 or 30 FPS
- 1080p (1920, 1080 pixels) 15, 24, 25 or 30 FPS
Format
Specify the format to export the video to. Multiple formats can be generated at the same time. After clicking ok, there will be a prompt to specify the filepath(s).
Create MPEG-4 Movie
Enable this option to save an mp4 video file.
Create AVI Movie
Enable this option to save an AVI file. AVI files can become very large, so it is recommended to use the lowest resolution and frame rate acceptable for the application and data.
AVI Options
Compression Codec choices include:
- Uncompressed
- Cinepak Codec by Radius (CVID)
- DivX (DIVX)
- DivX (DIV3)
- DivX (DIV4)
- DivX (DX50)
- FFMPEG Codec (FLV1)
- Intel IYUV codec (I420)
- Intel IYUV codec (IYUV)
- Microsoft MPEG-4 (M4S2)
- Microsoft MPEG-4 (MP43)
- Microsoft Video 1 (MSVC)
- Microsoft Windows Media Video 1 (WMV1)
- Microsoft Windows Media Video 2 (WMV2)
- Motion JPEG (MJPG)
- MPEG (MPEG)
- Sharp MPEG-4 (MP4S)
- Xvid (XVID)
The available codecs in this list can depend on the machine. Based on the compute, only the supported codecs will appear. The FourCC code is included in parenthesis. For more information see https://www.fourcc.org/
Quality
Use slider to set between 0 and 100%.
Create Image File for Each Frame
Use the option to Create image file for each frame to save each frame of a fly-through to a separate image (BMP, JPG, or PNG). The image frames may be created in addition to the video file(s), or in place of a video. The image frames may be used for additional video editing and then compiled into a video using video editing software and exported to additional video formats.
For example, using MS Movie Maker:
- Load all frames
- Select all
- Select edit and change duration to desired frame duration, such as 0.067 sec for 15 fps.
- Add effects and captions if desired
- Save video as an MP4 file (or other)