Batch Seismic Survey Conversions
A Seismic Survey Conversion Batch can be used to convert multiple similar seismic survey files at one time. To complete a Batch conversion, you must first be familiar with setting up an individual seismic survey conversion.
To create a new Seismic Survey Conversion batch:
Input Data
Select File>New>Batch>Batch Seismic Survey Conversion or right-click
inside the Project Manager (with nothing selected) and chose Create
New Batch > Seismic Survey Conversion Batch. Alternately, from
within an existing individual Seismic Survey Conversion job, the user
may right-click on the job and select Batch
Add... This will launch the Generate
Seismic Survey Conversions dialog.
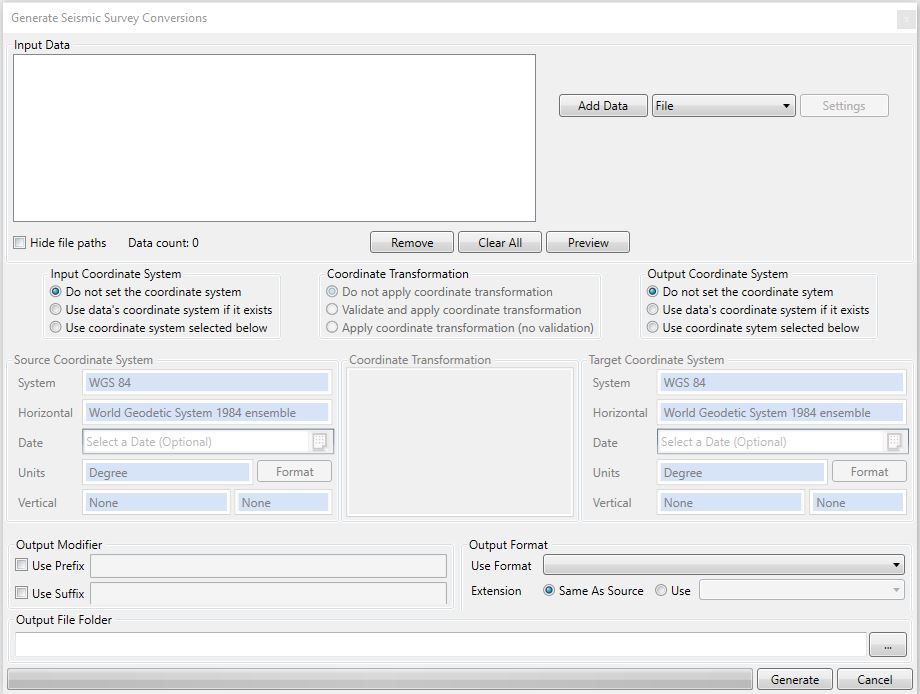
When using
the Batch Add Dialog, the first step is to specify all of the input data
that you wish to add to the job. This is done by clicking the Browse (...) button in the top right
corner of the dialog. The selected input datasets will be shown
in the Input Data window, and a single seismic survey conversion will
be generated for each of the files selected. You will only be able to
Batch Add one Format Type at a time, though the final Batch may contain
different Format Types (for example, both *.uko and *.seg files)
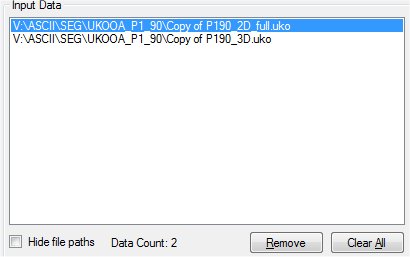
You may add additional files from other locations, though as noted above they must all be of the same Format Type. You may remove individual files from the list using the Remove button, or remove all of them using Clear All.
Coordinate System and Transformation settings
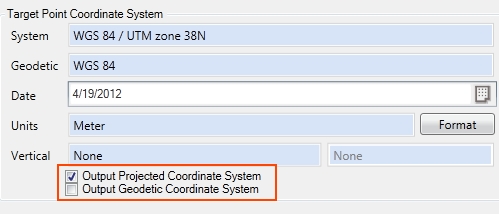
In a Batch Add, you will be using the same Input and Output coordinate systems for all files. Select your Input and Output coordinate systems as in a single Seismic Survey Conversion job. Note that the Output Projected Coordinate System and Output Geodetic Coordinate System must be on the same datum. If the Projected Coordinate System is changed, the Geodetic Coordinate System will be updated to match. If the Geodetic Coordinate System is changed, the Projected Coordinate System will be cleared if it is not on the same datum.
Note that
there are two output coordinate systems: projected and geodetic. Use one
or both depending on whether the file being processed contains columns
with projected and/or geodetic data. To enable conversion to one or both
you must check the box next to the desired coordinate system. In the following
case, for example, the projected data (Eastings and Northings) will be
converted, but geodetic (Latitude and Longitude) data will remain unchanged.
Use the Format buttons to select the display format for your input and output coordinates. This is very important for angular units.
If you select input and output coordinate systems that are based on different Datums, you will need to select a Datum Transformation. If you do not, when you Process the batch, you will receive validation errors on these jobs.
Out Files
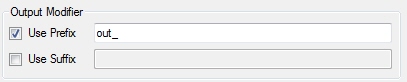
If desired,
set an output modifier for your output files. If you do not set a modifier,
the output file names will be identical to the input file names.
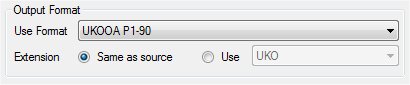
Set an output format. You can select either to maintain the same extension as the source files, or to use a specified extension for all of the output files.
Click the "..." button to set an output location for your converted files.

Generate
Click the Generate button to create the batch. A job will be created in the batch for each of your input files.
To run the jobs, right-click the Batch Seismic Survey Conversion and select Process. The Project Manager pane will show the progress of the jobs, and the Messages pane will display information on each conversion as it completes.