Geospatial PDF
In order
to save a geospatial PDF load the data into the viewer using the ![]() Create a New Map tool button.
Once your data is loaded use the
Create a New Map tool button.
Once your data is loaded use the ![]() Geospatial PDF button to launch
the Export to Geospatial PDF dialog
Geospatial PDF button to launch
the Export to Geospatial PDF dialog
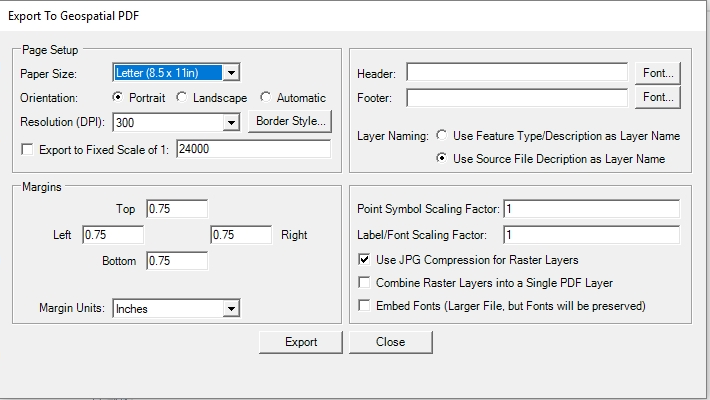
The options available on this page will allow you to define how the output PDF will look. When you have selected the appropriate settings click Export. This will take you to a standard Windows Save As dialog where you can define the name of the output file and where to save it.
Page Setup
Paper Size - Specify the page size.
Orientation - Landscape or Automatic are recommended orientation settings for Land Survey Summary.
Resolution- Resolution of raster data in dots per inch.
Border Style - Specify the style for a neat-line around the edge of the page.
Margins
Specify the margins around the edge of the page. The information shown in viewer will scale to fit the remaining page space.
Text
Optionally specify and style a header and footer for the page.
Layer naming can be set to the descriptions in the source file, or to descriptions of the types of features.
Formatting
- Point Symbol Scaling Factor - specify a scale factor for the point symbols.
- Label/ Font Scaling Factor - Specify a scale factor for labels.
- Use JPG Compression for Raster Layers - This will add lossy jpg compression to the embedded images.
- Combine Raster Layers into a Single PDF Layer - When unchecked, if multiple files are loaded in the viewer they will remain in separate layers. When checked they will be flattened into a single layer, and create a smaller pdf file.
- Embed Fonts (Larger File, but Fonts will be preserved) - check this option to embed the font in the file.