The Batch Convert/Reproject tool allows the user to easily convert multiple files from one format to another format.
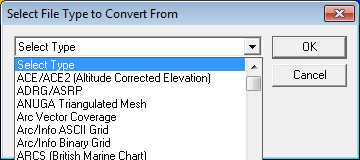
When the tool is selected from the File menu, the user is prompted to select the file type to convert from.
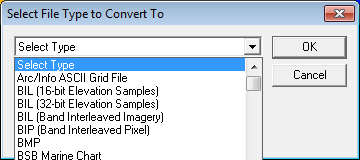
Once an input file type is selected, another dialog with a list of all
compatible export file types is displayed, allowing the user to select
what type of file to convert the input files to.
Finally, after the input and output file types are selected, the Batch
Convert dialog (pictured below) is displayed, allowing the user to set
up the batch conversion.
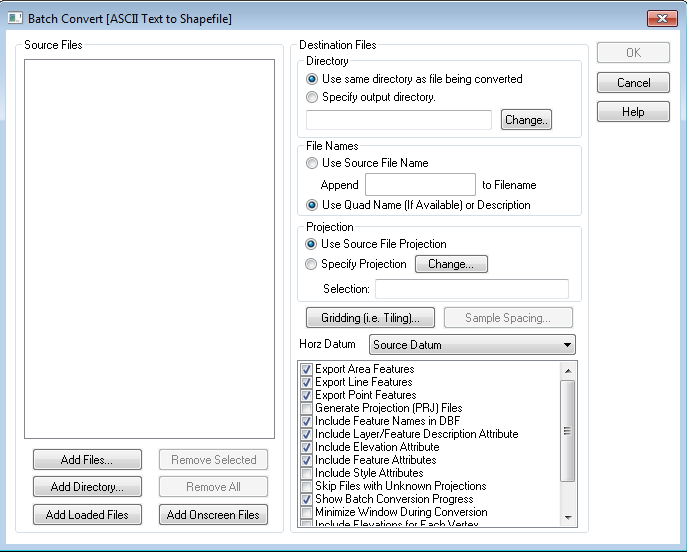
Source Files
The Source Files section displays the list of source files currently selected to be converted.
The Add Files... button allows the user to select additional files for conversion
The
Add Directory... button allows the user
to easily add an entire directory's worth of source files to the to-be-converted
list.
All directories under the added one can be recursively searched by answering
'Yes' to the dialog that pops up immediately after selecting the directory.
The Add Loaded Files button causes
all files loaded into the main Global Mapper view that match that batch
convert input type to be added to the list of files to be converted.
The Add Onscreen Files button causes all files loaded into the main Global Mapper view that are currently at least partially onscreen and that match the batch convert input type to be added to the list of files to be converted.
Destination Files
Directory
The Directory section allows the user to choose where they would like the newly created output files to be created. The Use same directory as file being converted option causes the output file created off of each source file to be created in the same directory as the source file. The Specify output directory option allows the user to choose a specific directory to output all of the newly created output files to.
File Names
The
File Names section allows the user to choose whether the newly
created output files should have the same file name as the source file
they were created from (Use Source File
Name option) or whether the more readable quadrangle name (if available)
or layer description should be used as the file name for the newly created
output file (Use Quad Name or Description
option).
The Use Source File Name option can be used to specify an additional text string to append to each new filename to identify it.
Projection
The Projection
section allows the user to choose whether or not each newly created output
file should either use the same projection as the file that it was created
from (Use Source File Projection
option) or if each file should use a projection specified by pressing
the Projection button.
If the user selects to specify an output projection and they select a zoned projection like UTM or Gauss Krueger, they will have the option on the projection selection dialog to have the best zone for the center of the output map automatically used if they select the Automatically Select Best Zone option in the Zone box on the projection selection dialog.
The Gridding (i.e. Tiling) button displays a dialog allowing the user to specify if and how to break up each file being converted into multiple new files. This option is only available when converting to a raster or gridded elevation format.
The Sample Spacing button displays a dialog allowing the user to choose to either keep the sample spacing of source raster and elevation files when converting the selected or to specify a new sample spacing to resample all of the selected input files at when performing the conversion. This option is only available when converting to a raster or gridded elevation format.
The Horizontal Datum selection allows the user to choose the horizontal datum that each newly created output file should use. By default, each output file will use the same horizontal datum as the source file that it was created off of. Alternately, the user can specify to have all output files created in NAD27, NAD83, WGS72, or WGS84 with the appropriate offset being applied automatically.
The Vertical Units selection is present only for some conversions and controls the output elevation units.
The Palette selection is present only for some conversions and controls the palette, if any, used in the output files. The palette values are defined as follows:
- Image Optimized Palette - The palette generated will be an optimal mix of up to 256 colors that will closely represent the full blend of colors in the source images. This option will generate the best results, but can more than double the export time required if any high color images are present in the export set. If all of the input data is palette-based and the combined palette of those files has 256 colors or less, then the combined files of the input file will just be used with no additional export time being required.
- Grayscale Palette - This palette consists of 256 scales of gray ranging from black to white.
- DRG Optimized Palette - This palette is optimized for the exporting USGS DRG data. The palette consists of only the standard DRG colors.
- DRG/DOQ Optimized Palette - As the name suggests, this palette is optimized for exporting a mixture of USGS DRG data and grayscale satellite photos (i.e. USGS DOQs). The palette consists of the 14 standard DRG colors with the remaining 242 colors being a range of gray values ranging from black to white.
- Halftone Palette - The palette consists of a blend of 256 colors evenly covering the color spectrum. This palette is the best choice when exporting anything but DRGs and grayscale satellite photos.
- Custom Palette from File - This option allows the user to choose a .pal file describing the palette to use for the export. A .pal file should be a text file with one line per color, with the red, green, and blue color components for each color in the palette separated by a comma. You can save a .pal file for an existing palette-based file by opening the Control Center, selecting the palette-based layer, press Options, then the Transparent Color button, then selecting the option to save a color palette file.
- 24-bit RGB - Create a full 24-bit color image with no palette. This will create the best resulting image but will also take the most space.
- 24-bit RGB Image (JPG-in-TIFF) - The 24-bit color image will be compressed using the lossy JPEG algorithm. Note that not all applications support loading JPEG-in-TIFF encoded files. JPG Quality is will be active if selecting the conversion where “JPG-in-TIFF” is selected as a palette.
- Keep Same as Source File - The new file will use the same color encoding as the source file, either palette-based, 24-bit RGB, multi-band, or grayscale.
- Multi-Band Image - The new file will be a multi-band image using the same number of bands as the input file. The bit depth will be the same as the input file.
- Apply Color from Imagery to Lidar - This option will be available if you have imagery loaded before you do the batch conversion and choose to create a Lidar LAS or LAZ file from vector data. (This option requires a Global Mapper Pro license.)
The additional list of options varies depending on the particular conversion being performed. The meaning of those options is defined below:
-
Add Watermark Image - when this option is checked, you will be prompted to select an image to use as a watermark for your raster format export. You will also be allowed to select display options for your watermark image, such as transparency, to provide the desired effect. The selected watermark image will be stretched to cover the entire output image for each converted file.
-
Adjust Image Contrast - causes the contrast of any input file to be automatically adjusted prior to being exported. This is useful for improving the display of some types of imagery.
-
Clamp Export to Lat/Lon Boundary - causes the export bounds of each image being converted to be clamped to the nearest 3.75' lat/lon boundary. This can be useful in limited cases, such as when reprojecting to geographic/arc degrees and the source images have a tiny collar to make the image square in the native projection.
-
Convert to Grayscale - causes the exported imagery to be generated in only shades of gray.
-
Crop to Selected Areas - this option specifies that each exported file will be cropped to any area features selected with the Feature Info or Digitizer Tools. If this option is selected, no output file will be generated for any input file that does not intersect any of the selected crop areas.
-
Export Areas, Export Lines, and Export Points - these options respectively control whether area, line, and/or point shapefiles are generated from the source vector data files. At least one of these options must be selected.
-
Export Hidden Layers from PDF Files - when this option is checked, hidden PDF layers will be exported.
-
Fill Small Gaps in Data - this option specifies whether or not small gaps in the elevation or raster file being exported will be filled by interpolating between nearby known values.
-
Force Square Pixels in Output - causes the newly created files to have square pixels in whatever projection they are created in. This allows the files to be used with the widest variety of other software packages, many of which do not correctly handle non-square pixels.
-
Generate Projection (PRJ) File - causes a projection file describing the ground reference system of the output file to be generated for each output file in addition to the output file itself. The PRJ file will have the same name as the output file with the .prj extension.
-
Generate World File - causes a world file describing the location of the output file to be generated for each output file. The world file will have the same name as the output file with the appropriate world file extension for the output type (i.e. TFW for GeoTIFF, JGW for JPEG, etc.).
-
Include Display Labels as Attributes - causes DXF attributes containing the name of the vector object to be associated with DXF POLYLINE entities. As some software packages cannot handle attributes in DXF files, you may have to turn this option off (with the associated loss of information) to get your exported DXF files to work with some packages.
-
Include Feature Attributes in DBF - causes the attributes other than layer and elevation of each feature (if any) to be stored in the DBF file associated with the generated Shapefile. In addition, selecting this option will cause the DLG-3 attribute codes matching each feature to be stored in the DBF file.
-
Include Feature Names in DBF - causes the name of each feature (if any) to be stored as a NAME attribute in the DBF file associated with the generated Shapefile.
-
Make Single Color Transparent - allows the user to select a single color to treat as transparent in the source data files. After a color is chosen, another dialog will open to specify the range of shades to include above and below the given color value (0 for an exact match, 128 most fuzzy).
-
Minimize Window During Conversion - this option causes the main map window to immediately be minimized when the batch conversion operation begins and stay that way until the operation completes.
-
Never Anti-Alias Pixels (Interpolate) - this option disables anti-aliasing (interpolation) even for those layers to which it would normally be applied by default (like gridded elevation layers) or imagery being reprojected or resampled.
-
Never Automatically Adjust Contrast - this option disables automatic contrast adjustment even for those layers to which it would normally be applied by default (like 16-bit per color channel images).
-
Only Generate Selected Support Files - causes only support files like world files, PRJ files, and TAB files to be generated. This is a very handy way to create metadata files for a large collection of files like GeoTIFF files in order to use the data in software that doesn't recognize embedded positioning information.
-
Remove Collar From Image - causes the collar of DRG-style images to be automatically removed from each image that is converted if collar bounds can be automatically determined. Note that some collar may remain in order to make the end result rectangular if the destination projection in not geographic lat/lon. If you check this option and the file being converted is also loaded in the main map view and has some custom collar cropping applied, those collar cropping options will be used rather than the automatic DRG-style collar setting.
-
Skip Existing Output Files - this option causes any conversion operations for which the default output filename already exists to be skipped. This is useful when resuming batch conversion operations that failed or were cancelled.
-
Use Big Endian For Elevations - causes stored elevations to use the big-endian (Motorola) byte order rather than the default little-endian (Intel) byte order.
-
Use Lossless Compression - this option causes the lossless compression method to be used when generating Global Mapper Grid files. If it is not checked, some minor loss of data in areas of high terrain relief will be allowed in order to achieve a higher compression ratio.
-
Use Other Source Files As Filler - causes all selected source files to be loaded and made available during export to fill holes in the main file being converted. This is useful when you have a collection of files that are being reprojected and you do not want to have a sliver around the edge of each new file filled with the background color when the source data does not make a perfect rectangle. You can even mark some files to only be used as filler by right clicking on them in the Files list and selecting the appropriate option in the popup menu.
-
Use Tile Layout (ADVANCED USERS ONLY) - specifies that any exported GeoTIFF or JPEG2000 files should be organized in tiles. For GeoTIFF if this isn't checked the default strip organization will be used.
-
Show Detailed Progress - this option allows users to display a window that reports progression and status of the files being processed.
You can also right click on the list of files to convert and choose to save that list of files to a text file. This can be a convenient way to start a Global Mapper script to do other processing on the files. Other right-click options include the ability to remove all archive files, like .zip and .tar.gz from the list and to fill the source files list with files listed in a text file.